We're getting down to the wire here. I'm scared that I won't have time to do all the work I want to, but there's really no time to even think about that. The costume competition is on the 23rd, which means I have only one weekend left before showtime. I've spent the last three days working constantly, since Jen was on a weekender to NYC, and I had basically no distractions. Each hour saw a bunch of work complete, but it just seems never-ending. The good news is, I have one arm basically finished and the other well on the way, along with a real chunk of the torso. The bad news is, I need to get all my lighting and electronics done this week, and finish up a million little things that stack up quickly. Here are some photos of what I've been working on.
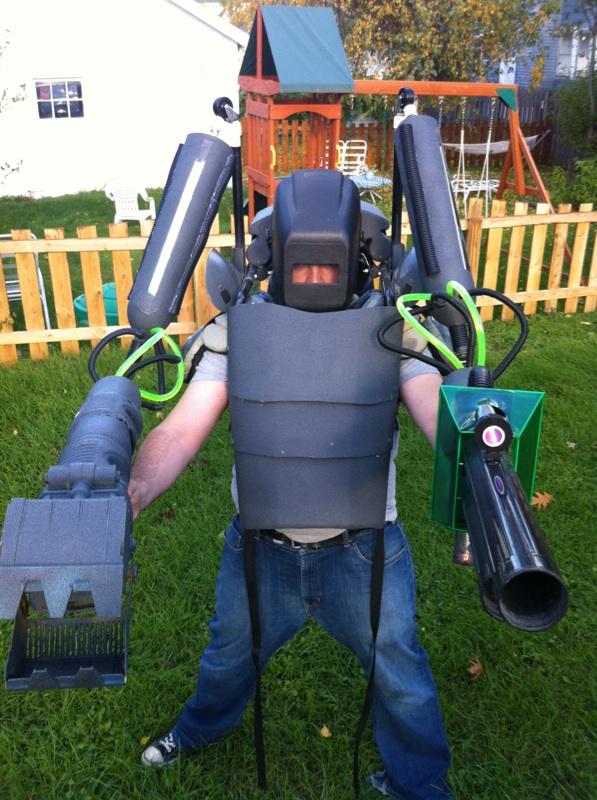
This first picture is a view of the "jetpack" that will be behind me. These diamond cuts were totally tedious to make, and then fill with a chickenwire-type material from some dollar store garbage can. It looks really nice, and will pop when I light the inside of the case. I also added a strip of electrical tape at the joint between the two barrel sections, which was such a small detail, but totally changed the look of the piece for the better. It's the little things.
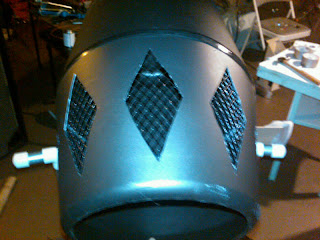
The feet have been re-done, again. I can't help it, I always end up hating how they look. That's changed now, since I love the look of the casing on these bad boys. So industrial, so awesome. The angle looks a little strange since you can see the shoes inside still, but you can't really from the front. The material is just this foamboard I picked up, cut into pieces basically freehand. The nice thing is that I actually thought ahead and figured I'd need to actually be able to tie the shoes and need access to do it, so I put the pieces together like this:
The sections nestle together, and are plenty sturdy, but give me the ability to actually wear the damned things. Works out well.
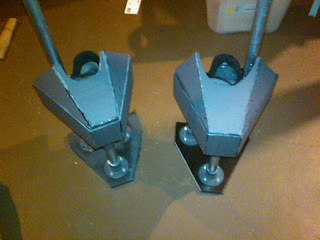
You've already seen the bottom half of this arm, and I didn't do anything special to it. I may still put some lights into it, but I haven't made any final decisions on that front. I like it being less light-up and more mechanical, so I may just leave it. However, more lights = awesome, so who knows. I think at this point, time will dictate. In this pic, you see the connection between the upper and lower arm, which has been added to. Where you'd see the ends of the bottles, I covered it with conduit to mask the material. I added more conduit as connectors at the joint. The green stuff is clear tubing filled with water and sealed off. The green comes from highlighter ink mixed into the water. It's a trick I've seen used in every college dorm ever to make blacklight-responsive vodka bottles. I like this application much more. Along the upper arm, I've removed the tape that masked the part that will be lit, although you can't really see it in that pic. The next two show it better. I've also added a strip of conduit to each side for detail. I think the arms are looking really amazing, and I'm excited to see it come together.

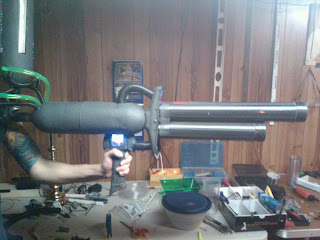
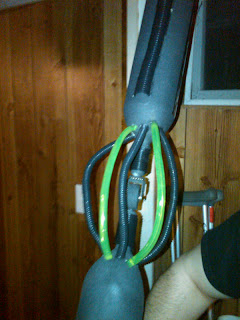
Here's the second arm, which is finally created. As you can see, I've decided to end it in a gun, rather than a claw. Curtis is modeling for us. The gun is made from some vacuum cleaner parts that we had kicking around. I used two for the barrels, which will eventually be lit up from inside. The handle is from a broken toy from Toys-R-Us, it used to be a sword. I extended the LEDs from the inside of the sword, and they're now located at the top of the barrels, they look like a laser scope. I still have a bit of work to do on the scope, but it's going to be killer. The white part in the second picture is another piece of the handle that lights up and spins. Kinda lame, kinda cool. I'll take it.
I've gone from zero to almost done with the left arm over the weekend, so I'm stoked - but every tick of the clock means less time till Halloween. This week I'm going to finish the arms and get started on assembling the torso pieces together. Hopefully when I finally get all the lights and batteries together, the thing will start to look like a Mech.
It's hard to take pics of everything at once at this point, since it's like 8 and a half feet tall, and in pieces, but as we get closer to H-day, I'll try to take some to show the costume in all its glory.